Friday 31 August 2012

Weekly Blog Project - Armful of Wishes

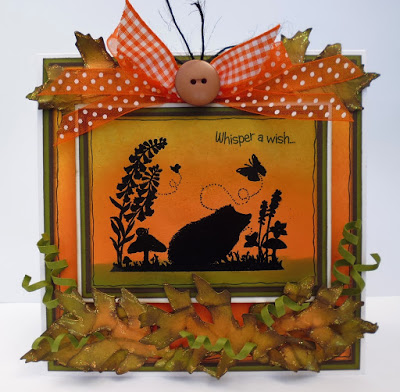
Good morning! It's my turn (Georgina) for the weekly blog project. For my card I have used the lovely Armfuls of Wishes stamp and given it a Christmas theme. You wouldn't think of this stamp as a Christmas stamp but with the right colours and embellishment I think it works.
 
 
To make this card you will need:
The new Christmas Tags stamps
Scalloped edge 148x148mm card blank
Smooth white card
Spellbinder Nestabilities Labels One dies
Die cut snowflakes
Scalloped edge punch
Small hole punch
3mm red satin ribbon
Red Card Candi
Diamond and Gold Stickles
Polar White FlowerSoft
Foam pads
Tuxedo Black Memento ink pad
Red ink pad
Black fineliner
ProMarkers: Gold, Cool Grey 1-5, Pastel Blue, Red, Berry Red, Cardinal Red, Maroon, Pastel Blue, Grass and Forest Green
 
 
1. Stamp the Armful of Wishes image onto smooth white card using the Memento ink pad. Colour in the image with ProMarkers. Cut out the coloured image as shown below using the Labels One die.

 
2. Add Polar White FlowerSoft for the snow on the ground and Diamond Stickles for snowflakes in the sky. Allow to dry.
 
 
 3. Die cut a piece of red & white dot paper using the largest Labels One die. Attached the coloured image to this.
 
 
4. Stamp the mouse image again. Colour the flower only. Cut out the flower and attached it to the coloured image with foam pads.
 
 
5. Cut a 135x140mm piece of red card. Cut a 125x140mm piece of white & red dot paper. Punch one of the shorter edges with scalloped edge punch. Attach this to the red card.
 
 
6. Stamp the tag greeting using the new Christmas Tags stamps. Cut out the tag and also a piece of red card to the same shape. Draw faux stitching around the red tag. Punch a hole through the tags and thread red ribbon through. Attached the tags and ribbon to the red panel. Tie a bow from the red ribbon and attached to the tags.
 
 
7. Attached the red panel to the card blank. To finish add card Candi and snowflakes.
 

Thursday 30 August 2012

Christmas Tags

We have a new set of Christmas Tag stamps, 12 little tags in one pack each bearing a Christmas greeting.


 Each tag measures (3.5cm x 3cm),  each one bears a different greeting and we have purposely kept the tags plain to enable you to use them with anything!

Here are a couple of card samples from our Design Team:

from Helen N - 3 tags in a row

from Helen N - stamped onto kraft paper alongside our 'A little bird told me' stamp

from Georgina, with RWAV Nativity stamp set

we love it when the doors open to reveal the Nativity scene!

from Donna - stamped with our 'Cold Crisp Kisses' stamp

and from Donna again together with 'At Home' stamp set
Our lovely new Christmas Tag set containing 12 stamps is on sale now for just £7.50 over on our web and if you like any of the stamps we have featured here, just click on the link and you can see them in their full glory!  plus lots of card samples too.

OK girlies, as this is a NEW SET we have 3 up for grabs - yippeee! (you will get a lot of use from this great set)  Please leave a comment by 12pm Monday 03 September 2012 telling us which of the 5 card designs above is your fave and we will announce 3 lucky winners!

Little Claire x


Wednesday 29 August 2012

New Paper Pads!

Just Arrived:  Four new 6 x 6 Paper Pads full to the brim with the most gorgeous papers for your crafting projects:

First off is First Edition 'Blank Canvas' a 64 sheet 6"x6" paper pad with fabric textures, glitter effects and double sided designs.

Blank canvas is a charming collection inspired by shabby chic designs with a warm colour palette of coordinating blues, pinks, greens and creams. Detailed patterns, distressed polka dots and gorgeous florals create a perfect blank canvas for your paper craft projects.

Next:

First Edition 'Noir et Chic' a 64 Sheet 6"x6" paper pad with pearlescent papers, glitter effects and double sided designs.

Noir et chic is a luxury collection of exquisite black and cream designs with rich detailed patterns. Bold designs with understated chic for all occasions, this paper pad is wonderfully versatile.

Both of these pads retail at £7.99 and you can get them on our web for £7.50 (less 10% if a club member)

And for Christmas here are two lovely new paper pads for just £3.99 each:


 Back to Basics Christmas Modern & Vintage both containing 72 sheets, 6 sheets of 12 designs, 150gsm card stock.

A great selection of new papers on our web now!

Little Claire x


Friday 24 August 2012

Weekly Blog Project - Pop up Slider

Good Morning everyone, hope you are all happy and well. It's my turn ( Donna ) to show you a project and tutorial made using some gorgeous Little Claire's goodies.

Here is the finished card....


You will need : Butterfly Tree stamp set.
Kraft & green coloured card
Dovecraft Princess Fairytale patterned paper
Spellbinders Labels 8 & Small circle & Scallop circles 
Promarkers
Memory Box Spring Border die
Martha Stewart Butterfly punch
Scrap of acetate
Spotty ribbon 
.....and here are the instructions.


a) Using a piece of card measuring 28cm x 15cm sore as shown above at 2 1/2cm, 7cm, 9 1/2cm, 14cm, 18 1/2cm, 21cm & 25 1/2cm. 

b) Cut a 10 1/2cm x 2mm slot in the middle of the 14cm score line as shown below.


c) Die cut the largest Labels 8 in kraft & patterned paper and emboss both. (a little tip - trim off the embossed edge of the patterned paper to create a thin border ). Stamp the Butterfly tree, colour and glitter and die cut with 2nd largest labels 8. As shown below.


d) Promarker colours are....

e) Cut a piece of Kraft card measuring 9 1/2cm x 3 cm.


f) Then stick to the bottom of Kraft Label 8 as shown below.


g) Fold the large, scored piece (the base) as shown below.


h) Insert the Kraft label into slot and glue the added piece onto the center of End A as shown below.


i) Glue end A to end B as shown below.


j) Slide down the base so card stands.


k) Stick on patterned paper as shown.


l) Decorate and embellish with sentiment, ribbon & die cuts. I've attached the butterflies with some thin strips of acetate so it appears they are fluttering around. Please be careful only to put embellishments on the base and very top of the label at this point, otherwise the card won't slide flat to put in an envelope.


I hope you enjoyed my little tutorial and will have a go at making one for yourself. If you do, please let us know as we would love to call by your blog and have a peek at what you have created.

Huge Hugs Donna x

Wednesday 22 August 2012

After the show...

..... Steve has returned to the fold after exhibiting our goodies at The Great British Craft Festival in Donington at the weekend, and what a weekend it was!
A very busy and well attended show but very hot inside and Steve was so glad that his stand was close to the doors to benefit from a welcome breeze!

Steve at the latest craft show
 And here he is with the latest addition to his stand - his new 'Stampers' sign, great eh? And he has fairy lights around it, look out for Steve's stand if you are visiting any shows this year and get your picture taken with it!

Enough of our Steve, back to cards and here is a wonderful one sent across by Donna one of our DT's:

Daisy Bunting, designed by Donna
Just gorgeous!  This card has been made using one of our 'Loverly Jubblie' stamps: Daisy Bunting and we just love the colours and layout, thank you Donna.

Little Claire x

Saturday 18 August 2012

Little Claire Monthly Challenge # 24 'Best Friends'

Good morning, another challenge starts today on our blog, but first a big thanks to all that took part in our 'Summer' challenge last month.  As always, we had lots of fabulous entries. We can only have one winner, and picked randomly this month's is :

Sue # 53


Here is her stunning winning card using our Beach Hut's image. It really sums up our challenge theme - Well done Sue!  Please contact Carol@www.littleclaire.co.uk to receive your prize.

Our Little Claire top three this time are :

Caroline (# 8)
Jocelyn (# 12)
Sarah (#71)

Well done ladies! Please feel free to grab the blinkie from the side-bar and display on your blogs - thanks for playing along!

Now to Challenge # 24 -
 It is themed 'Best Friends', so we want to see your images with that theme. For example, it can be a girlfriend, boyfriend or pet anything along these lines.

Our prize this month is three Little Claire Stamps worth £5.50 each

We have a few rules that we would like you to follow, when entering our challenge, they are :

(1) You DO NOT need to use a Little Claire stamp to qualify for the prize draw.
(2) Only those using Little Claire stamps will qualify for a Top 3 badge.
(3) You may enter the challenge UP TO 3 TIMES ONLY PLEASE and you may combine with other challenges.
(4) You MUST follow the challenge theme and NO BACKLINKING please, new cards only.
(5) Please provide a link to our blog in your post.
(6) Please leave a link (via link below) to your actual card, not just to your blog.
(7) Please turn off Word Verification on your blogs,it makes it so much easier & quicker to leave a comment on your blogs.
(8) The challenge finishes on Friday 14th September @ 18.00pm and the new challenge (#25) will be open on Saturday 15th September 2012.


Here are out Design Team cards for this month, they have worked their magic with lots of gorgeous cards to inspire you!


Donna using 'Cutie Patootie' - 'Bert & Mary on Swing
 and 'Little Cutie's' Die Cut Tags

Gaynor using 'We Three Cats' and 'Super Six' Sentiments


Gemma using 'Cutie Patootie' - 'Bert & Mary on a Tree'
and 'Claire's Sentiments'


Georgina using 'Loverly Jubbliee' - 'Robert & Daisy Umbrella' &
'Sunshine Sentiments'


Heidi using 'Victoria' & Little Claire sentiment


Helen N using 'Little Shep' and 'Super Six' Sentiment


Helen R using 'Little Shep' and 'Super Six Sentiments'


Lyndsey using 'Flossie & Pootle' Digi Stamp


We will be popping on over to see your creations, please leave us a link and of course, we always love it when you leave us comments.

Please remember the last day to enter our challenge is Friday 14th September 2012.

Have fun, enjoy and good luck!

The Little Claire Design Team

xxxx

Friday 17 August 2012

Weekly Blog Project - Cutie Patootie Gift Bag.

Our weekly Friday Project – from DT Member Gaynor Bloor

Cutie Patootie Gift Bag using Garden Design Papers.

Good morning everyone, my turn today for the Little Claire Weekly Project.  What a dilemma so many lovely stamps to choose from and delicious collection of papers, ribbons and accents available.

So given absolute “free” choice – it had to be Cutie Patootie – Bert and Mary on a swing!  Using the Garden Design Papers, ribbon and butterflies from Little Claire – check out their amazing and ever increasing easy to navigate website.


I have chosen to make a little gift bag – mine fits a copy of the must have “books” currently flying off the shelves………


Okay here goes:

Ingredients:

2 A4 sheets of base card
Backing papers – I have used an assortment from the Garden Design Range
Ribbon, adhesive gems
Border Punch (MS), tiny flower punch
Card Candi
Promarkers
Double sided tape, wet glue, 3D foam pads
Ribbon maker.
Pokey Tool
2 Brads.
Black Memento Ink Pad

Method:

Punch border across both A4 card pieces.


Score and fold borders down sides, base and across the top – I have left a 5cm border at the top and 4cm borders sides and base.


Cut backing papers to matt onto front, back and sides. 


 Adhere accent paper after border punching to front paper. 


Wrap ribbon and fix around front paper and fix to base front card. 


Create bow using bow maker and fix.

Make up bag – adhere using double sided tape.  Ensure top border is folded forward prior to sticking sides together.


Make up handle and fix using brads to the sides.


Stamp out image and colour using promarkers.  Trim to 9cm x 8cm


Cut two pieces of backing paper 9cm x 8cm and matt stamped image.

Punch tiny flowers and add for accents

Colour Card Candi using promarkers and fix using 3D pads to top of the bag

Add adhesive gems to front top border and tiny flowers.

Fix butterflies from Garden Designs Sheet.

Add tissue paper and a copy of your favourite book – perfect gift for a friend!

Hope you like and feel a little inspired to be creative – whatever you are doing, enjoy!

Cheerio for now.  xx Gaynor