Friday 28 December 2012

Friday Project - Daisy Pitcher

I hope you all had a lovely Christmas.

It is my turn (Georgina) for this weeks Friday Project. The card I have for you has a Spring feeling, with bright colours and flowers. A nice change from all those Christmas cards we have all been making recently. I have tried something different for this card by stamping the Daisy Pitcher image onto the pattern paper and then colouring rather than onto white card.

 
To make this card you will need:
Daisy Pitcher stamp
Sunshine Sentiment stamps
White dots on pale green pattern paper
White card
Dark green card
148x148mm card blank
3mm green ribbon
Lacey Circles Nestabilities
Tuxedo Black Memento ink pad
Black fineliner
Sakura Gelly Roll pens: Pink, Yellow and Green.
White Card Candi
ProMarkers: Forest Green, Cool Grey 4, Cool Grey 5, Yellow, Antique Pink, Cocktail Pink, Baby Pink.
 
 
1. Cut a 7x10.5 cm piece of dotty paper. Stamp the Daisy Pitcher image using the Memento ink pad onto the dotty paper.

 
2. Colour the stamped image with ProMarkers. Colour the heart and highlight the flowers with the Sakura pens.

 
3. Cut a piece 8.5x12 cm of dark green card and 8x11.5 cm of white card.

 
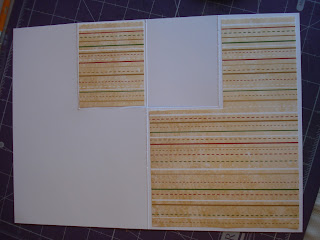
4. Attached the panels together as show below. Draw 'dot-dash' faux stitching around the edge.

 
5. Cut a piece 14.2x14.2 cm of dark green card, 13.5x4 cm and 13.5x8.5 cm of white card, and 13x3.5 cm and 13x8 cm of dotty paper. Attach the pieces as shown below. Draw 'dot-dash' faux stitching around the edge. Attach a strip of green ribbon across the dark green panel before attaching to the card blank.

 
6. Stamp the sentiment onto dotty paper and then  cut out. Die cut a Lacey Circle from white card and attached the circle sentiment to it.

 
7. Attached the Daisy Pitcher image panel and sentiment to the card. Tie a bow from the green ribbon and attached to the card. To finish add Card Candi.

 
Happy New Year to everyone!

Friday 21 December 2012

Last Minute Treat Box


Welcome to another Friday Little Claire Blog Project - this week it's my turn (Helen N) to share a project with you and I've chosen a very simple treat box.  It would work for any time of year but is  perfect for last minute Christmas gifts and is very simple to make.

Here's what you'll need to make it:


1 piece of 12 by 12 patterned paper
Little Claire 'The Magic of Christmas' stamp set
circle and scalloped circle dies
ribbon

And this is what you need to do:


1. Score and fold the red Bazzill in to nine equal sections as shown in the photo.  A little tip - if you don't have a score board big enough for this (mine is A4) size, you can use a 12 by 12 paper trimmer instead. Lift the blade away from the card and then score along the indent in the base using an embossing tool - this also makes it easy to measure your card.


2. Next, starting from each corner of the square in the middle of the sheet, score outwards to the four corners of the sheet.  Mountain fold these score lines as shown in the photo.

3. Next you need to decorate the box.  I've kept mine very simple but you could add lots more to yours if you want to.


I cut four squares of green card slightly smaller than the square panels on my box and then attached a piece of patterned paper to each of the green squares (as shown in the photo above).


4. I stamped the sleigh image (in Memento) and words from the stamp set (in Versafine), die cut it into a circle and coloured with Promarkers


 Then I attached the circle and scalloped circle together and matted on to one of the patterned paper panels.


5. Open the red card out and attach the square panels as shown.  A little tip - before sticking the image panel in place, fold up the box to make sure the image and words are the right way up.


 6. Next use a single hole punch to put holes in each of the triangle panels as shown - to make sure the holes are even, pinch the triangles together and punch through both together.  Here's a close up of one of the corners:


7. Fold up the box and thread ribbon through the holes to hold it all together


 Keep pulling gently on the ribbon until the box looks a similar shape to this (overhead view)


Finally tie the ribbon in a bow.


Hope you like this project - please leave me a comment to let me know what you think.

Happy Christmas from me and the rest of the Design Team - hope you all have a wonderful and peaceful holiday.

Helen xx

Saturday 15 December 2012

Little Claire Monthly Challenge # 28 - 'Happy New Year'

Hello and thank you to all that took part in our 'Christmas' challenge last month, we were inundated with gorgeous entries, 262 in total!!
 
Our Winner of Challenge # 27 is ........

Sarah Bell # 40. 
 
Here is her winning card, she has used 'Little George' and a die-cut sentiment, such a gorgeous little Christmas card.


Well done! Please contact Carol (carol@littleclaire.co.uk) who will forward your prize to you.
 
Now to our Top Three entries, that have used a Little Claire images/stamps on their makes.
 
 Andrea # 102
Sazzle # 176
Sparkly Fairy # 225
 
Thanks for joining in our challenge ladies, please feel free to take the blinkie from the side-bar and show it off on your blogs.


Our challenge for December is 'Happy New Year'.  The Design Team have come up with various cards etc., if youl would like to enter our challenge, please read the instructions below and add your entries to the linky below so that we can come and see what you have made.

Our prize for this month's challenge is a Little Claire Voucher to the value of £15.00 to spend on-line. 


Now to some inspiration from the Little Claire Design Team :


Donna using
'Daisy Alphabet' stamp set


Gaynor using
Little Claire 'Elephant' & 'Georgina's Bunting' stamp sets


Gemma using
'Silhoette Manger' & 'Christmas Tags' sets


Georgina using
'An Armful of Wishes' stamp


Heidi using
'Flowerhead stamp'
 
 
Helen N using
'Daisy with Bunting' & 'Daisy Alphabet' stamps


Helen R using
'Sunshine Sentiments' & 'Georgina's Rosette's' stamp sets


 Lyndsey using
'Sleep Tight' image


We have a few rules that we would like you to follow, when entering our challenge, they are :

(1) You DO NOT need to use a Little Claire stamp to qualify for the prize draw.
(2) Only those using Little Claire stamps will qualify for a Top 3 badge.
(3) You may enter the challenge UP TO 3 TIMES ONLY PLEASE and you may combine with other challenges.
(4) You MUST follow the challenge theme and NO BACKLINKING please, new cards only.
(5) Please provide a link to our blog in your post.
(6) Please leave a link (via link below) to your actual card, not just to your blog.
(7) Please turn off Word Verification on your blogs,it makes it so much easier & quicker to leave a comment on your blogs.
(8) The challenge finishes on Friday, 11th January 2013 @ 18.00pm and the new challenge (#29) will be open on Saturday, 12th January 2013.
 
Good luck, we are all looking forward to seeing what you create using our theme.
 
Lastly, all at Little Claire want to wish you a wonderful Christmas and a Happy New Year.  Thank you for joining in our challenges and we are all looking forward to more of them in 2013.
 
 
Steve, Gill, Carol,
Donna, Gaynor, Gemma, Georgina, Heidi,
Helen N, Helen R & Lyndsey
 
The Little Claire Design Team
 
xxxxxxx
 
xxxx


Friday 14 December 2012

Bright Blue Skies - Easy Peasy Calendar

Hi there! Donna here with a little tutorial for an easy peasy calendar.


You will need: Bright Blue Skies stamp set from Little Claire Designs
Promarkers
Spellbinders -Grand Labels 23, Picot Edge Circles & Les Papillons
First Edition Boho Chic paper pad
Kraft card
Length of ribbon
Calendar

Cut out one of the Labels 23 out of kraft card & also the next size down out of patterned paper
Cut the largest of the Picot  Gircles out of kraft card
Cut the butterflies out of both kraft & patterned paper


Stamp & colour the very cute little boy from the stamp set.
Here are the colours I used.


Cut out the coloured image using a circle die.


Assemble as shown, attach the ribbon on the back for hanging.

Hope you liked my little tutorial, make sure you pop back next week for another project from one of my super talented teamies.

Hope you have a lovely day and keep warm.


Wednesday 12 December 2012

T'whoo Owl Cards...

... one of our teamies Lyndsey, ran a class recently and here are two cards that her ladies made:

Christmas Owl Tree
Sleep Tight


Lyndsey got the ladies to follow a sketch and they used the 2 different christmas owl stamps; Christmas Owl Tree and Sleep Tight.

Thanks for sharing these lovely cards and we hope your ladies had a great time - if you live near the West Midlands and would be interested in attending any of Lyndsey's classes please get in touch and we can ask Lyndsey to contact you.

How cold is it here in the UK today?  My fingers are freezing typing this and here is what I saw out of the window this morning:

It's beginning to look a lot like Christmas............. we have seen some beautiful sights today, white trees & fields, glad to be inside in the warm now though!

Little Claire x

Monday 10 December 2012

Darling Daschunds

Here are a couple more cards made with our New Darling Daschunds stamp set:

One from Helen N, a lovely card made using lots of the elements within the set, the two doggies facing each other have worked really well and we like the elements laid out in a row, everything you see on this card (and more) are in this super DL set of stamps......

designed by Helen N

This next card from Heidi has made good use of the smaller row of Daschunds included within the set, they
designed by Heidi

have made a border feature around the circular sentiment also in the pack, love the colours!

Next we have a lovely card with a fresh spring feel from Gemma, green and white always seem such a clean combination:
designed by Gemma
We like this card from Donna, the image you see on the right (butterfly Daschund) closes in and the left panel
folds down to sit on top:
designed by Donna
And finally from Lyndsey a strking red and blue card, fabulous layout, and clever use of shading for the sky background behind Daschund:
designed by Lyndsey
So that's our club stamp set for December - December already? Hard to believe, and a quick note to all of our club members; we will be sending out the January packs from next week, this is to avoid delays with the Christmas and New Year holidays, we don't want you to be waiting into the New Year for your packs and you will have a nice new pack to play with over the holiday period - perfect x

Little Claire x


Friday 7 December 2012

Friday Project - Owl Tree

Morning, tis my turn - Gaynor for the weekly Friday Blog Project from Little Claire.  Christmas is a coming................the project I have designed for today pretty much sums up the season for me...........the colours, the glitter, thoughts of the countryside, the wider world, having the opportunity to get outside over the winter break..........taking time to appreciate just how good things really are...........and I am very grateful.


I have used Little Claire's Owl Tree, backing papers from LC - selection of promarkers, card candi, glitter glue, spotty ribbon and a MS snowflake punch plus smaller snowflake punch.


The card is created on an A4 piece of white card cut so:

Then the backing paper is measured over the base card and cut:

Add the ribbon to a strip of cordinating paper.


Punch and layer up the snowflakes. Stamp sentiment and layer onto scalloped punched mount.

Stamp and colour images. Cut out separate little owls to add as an embellishment later.


The card is not a quickie design................but perhaps a special card for a special person or persons.......I have adapted this design into an Anniversary Card for my parents who are celebrating their 55th Wedding Anniversary on December 21st.................Many congratulations Mum and Dad :)

Thank you for taking the time to check out my weekly project for Little Claire.

Wishing everyone a safe and Merry Christmas and a Happy New Year.
 xxGaynor